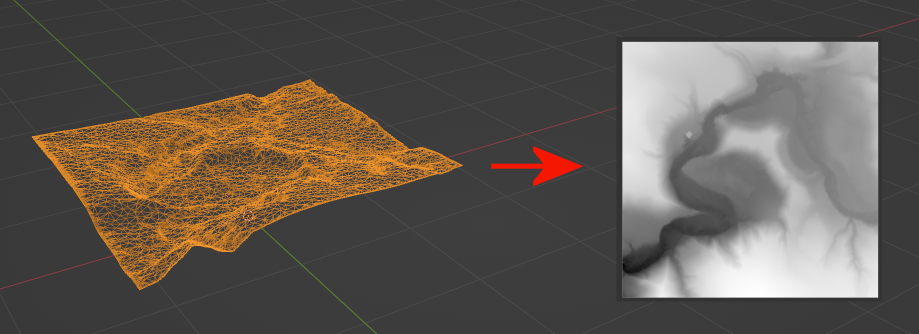
Mesh to Heightmap Conversion
Alternative methods
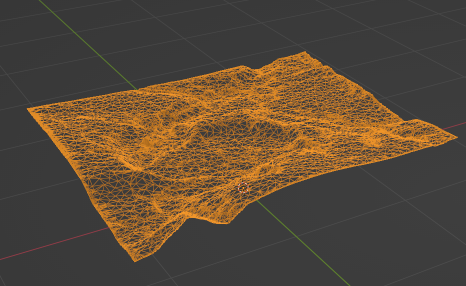
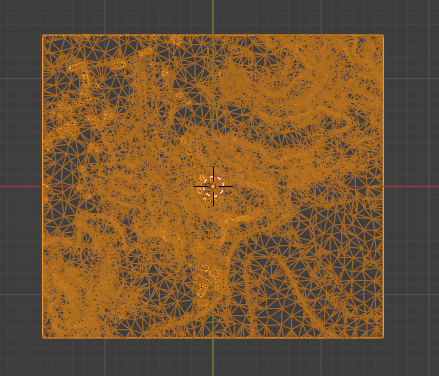
Import your mesh into the Blender
Blender v3.6.23 used in this guide.
Define mesh's vertical axis
Go to Scripting:

Copy paste this code:
import bpy
obj = bpy.context.object
xs = [v.co.x for v in obj.data.vertices]
ys = [v.co.y for v in obj.data.vertices]
zs = [v.co.z for v in obj.data.vertices]
print("Local ranges:")
print("X:", min(xs), max(xs), "range", max(xs)-min(xs))
print("Y:", min(ys), max(ys), "range", max(ys)-min(ys))
print("Z:", min(zs), max(zs), "range", max(zs)-min(zs))
to the left panel:

You should get something like this:

The one with the smallest range is our vertical axis.
Y happens to be the vertical axis of the bounding box. It does not match the usual Z axis, but it is ok.
Y being “up” is fine because a heightmap only stores relative elevation (a single height value per horizontal point). It doesn’t care whether that height comes from Blender’s Z, Y, or X—only that you use the same axis consistently when baking and when using the heightmap in-game.
The range here 0.3196... is the difference between lowest and highest point. You could need this value in the future.
Camera Positioning
Back to Layout:

On the numpad press 7 then 5.
On the left top corner you should see:

Switching to Orthographic Top View (Numpad 7 then 5) is necessary for accurate heightmap results in Blender. Why?
- Perspective distortion: Without orthographic mode, the camera's perspective view warps the terrain (closer peaks appear larger, distant valleys compressed), leading to inaccurate height sampling and a distorted map.
- Top-down projection: The top view ensures the camera looks straight down (perpendicular to the XY plane), aligning perfectly with how heightmaps work (Z-height encoded per X/Y grid).
Set Up a Height-Based Material
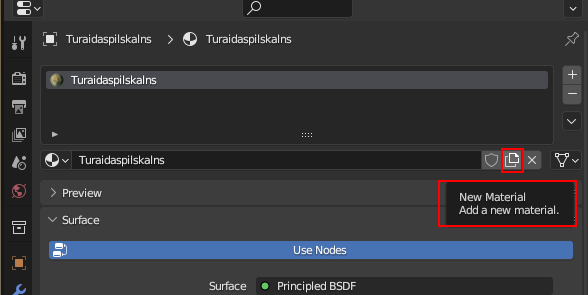
Select the terrain mesh:
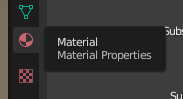
Go to Material Properties tab (red sphere icon):
Click New material:
Configure Height-to-Color Shading
Go to Shading:
Delete the default Principled BSDF node. Click on it and the press Del to delete it:

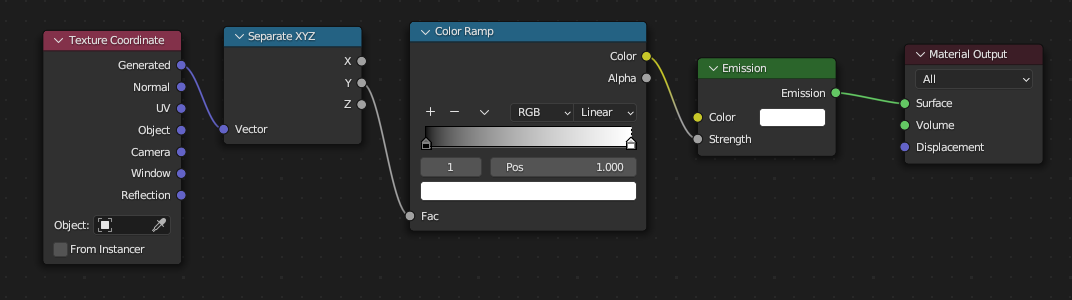
Add these nodes (Shift + A) (position the mouse at the botton middle window before that):
- Input → Texture Coordinate
- Converter → Separate XYZ
- Converter → ColorRamp
- Shader → Emission
- Output → Material Output (if not present)
Connect:
- Texture Coordinate → Generated output → Separate XYZ
- Separate XYZ → YOUR_VERTICAL_AXIS (in our case it's Y) → Color Ramp
- Color Ramp → Color → Emission → Strength
- Emission → Material Output (Surface)
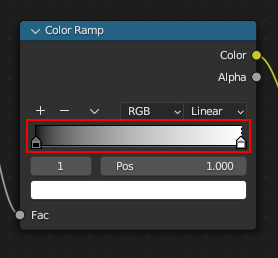
Should look like this:
If your vertical axis is Z - connect Z to the Color Ramp
- Set/Leave ColorRamp to Linear, black on left, white on right.
- Adjust handles to match your terrain min/max height.
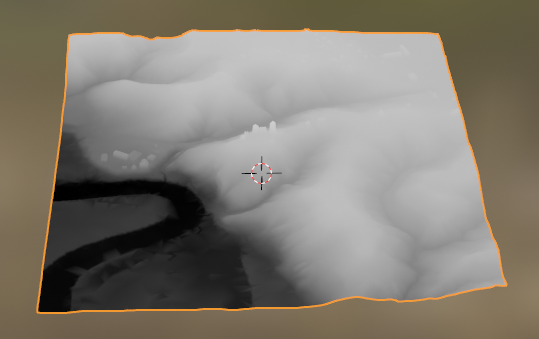
Should see the result:
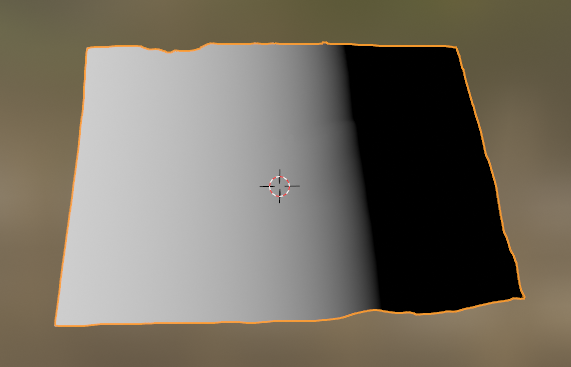
If you mapped your vertical axis incorrectly:
You will see something like:
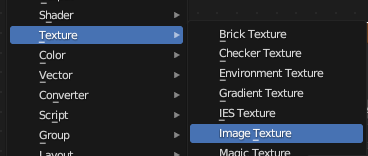
Add Image Texture node
In the material, add an Image Texture node (leave unconnected).
Ctrl+A - Texture - Image Texture:
Create a new blank image: click New → name it "Heightmap", set resolution (e.g., 4096×4096), choose 32-bit Float for best precision.
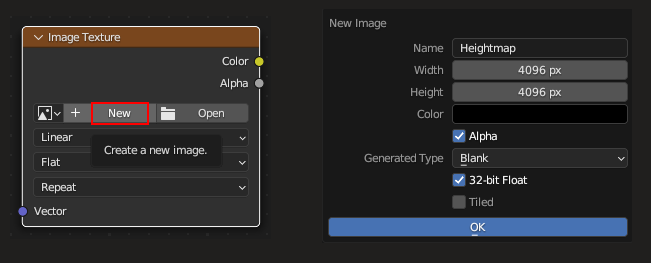
Leave Image Texture node unconnected, but select it, so it will have a white border (VERY IMPORTANT!):
Bake the Heightmap
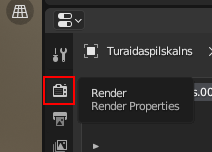
Go to Render Properties tab (right vertical menu):
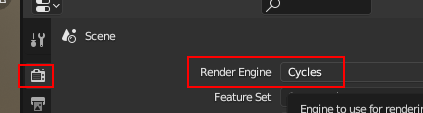
Select Render Engine: Cycles:
Under Bake:
- Bake Type: Emit
- Margin: 0
- Click Bake
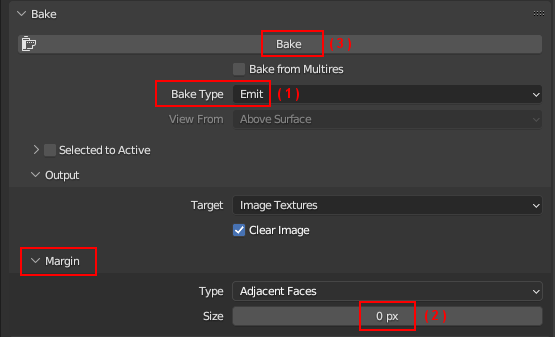
Should see at the bottom:

your CPU will be 100% for a few moments.
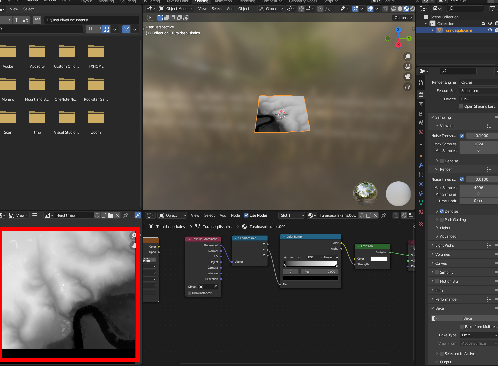
In the bottom left corner you should see your generated heightmap:
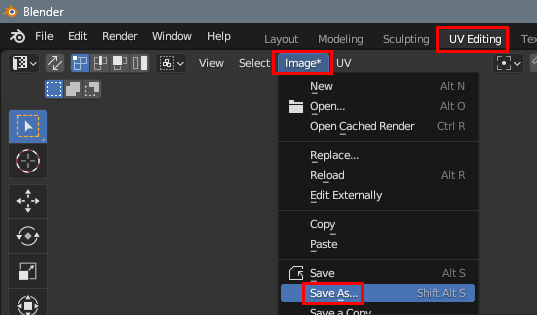
Save the PNG
After baking, in the UV Editing → Image → Save As → choose PNG:
JOB DONE!
Length and width of the mesh in meters
You need these values if you want to have realistic scene dimensions in the Editor.
This could be tricky.
One way is to put the mesh on the real map and approximate the length and width of the mesh.
Other way - to use some GIS software if your mesh comes in different format (I use planlaufTERRAIN because I have mesh in plfzip format).
Height difference of the mesh in meters
When you know the width or the length (if mesh is not square), you can get the height, or to be more precise - the difference between the lowest point and the highest point.
Take the Y (vertical in our case) range from the first step (0.3196 in our example) and length (X range 3.138 in our example) calculate your height difference:
0.3196 * LENGTH_IN_METERS / 3.138 = HEIGHT DIFFERENCE
You will need all these values before you will import your heightmap to the Editor to set the scene dimentions properly.